

Comparing Traditional vs. Vacuum-Powered Laundry Chutes
Modern buildings increasingly prioritize convenience, hygiene, and efficient material handling. One often overlooked but important feature in multi-level homes, hotels, hospitals, and commercial facilities is the laundry chute system. Traditionally, laundry chutes have relied on gravity, but technological advances have introduced vacuum-powered alternatives. Long Island Laundry Jet is a leading solution in this space, offering modern, efficient vacuum-powered laundry systems.
This article presents a detailed comparative analysis of the traditional vs. vacuum laundry chute, focusing on three key factors: efficiency, installation, and maintenance. The goal is to provide a clear, non-promotional guide for prospective buyers who are evaluating which solution best suits their space and operational needs.
Understanding Laundry Chute Systems
Laundry chute systems are vertical or horizontal channels installed in multi-level buildings to move clothing efficiently from upper floors to a central collection area, reducing manual handling, improving hygiene, and supporting streamlined laundry management.
What Is a Traditional Laundry Chute?
A traditional residential laundry chute is a vertical or slightly inclined tube installed between multiple floors of a building. Its purpose is to allow laundry to fall by gravity from upper floors to a collection point below, usually a laundry room or utility area.
These systems are typically made from stainless steel, aluminium, or fire-rated materials and rely entirely on gravity for operation. There are no moving parts beyond the access doors.
Key features include:
Vertical or angled shaft
Wall-mounted or built into a designated enclosure
Hinged intake doors on each floor
A collection bin or trolley at the bottom
What Is a Vacuum-Powered Laundry Chute?
A vacuum-powered laundry chute uses air pressure and mechanical suction to transport laundry through a sealed pipeline. Unlike traditional systems that depend on gravity alone, this system actively moves items via airflow generated by a vacuum unit.
Vacuum-powered chutes are often used in hospitals, hotels, and large residential complexes where hygiene, speed, and long-distance transport are priorities.
Common features include:
Sealed, horizontal and vertical pipe network
Central vacuum motor or turbine
Automated or sensor-based inlet points
Enclosed collection chamber
Traditional vs Vacuum Laundry Chute: A Detailed Comparative Analysis
The table below offers a side-by-side comparison of the two systems across major decision factors relevant to prospective buyers.
| Feature | Traditional Laundry Chute | Vacuum-Powered Laundry Chute |
|---|---|---|
| Mode of Operation | Gravity-based | Air suction and vacuum pressure |
| Power Requirement | No electricity required | Requires continuous or periodic power |
| Speed of Transfer | Depends on gravity and shaft height | Faster, controlled transport speed |
| Pipe Layout | Mostly vertical | Can be vertical and horizontal |
| Installation Complexity | Moderate to high | High due to machinery and ducting |
| Structural Requirements | Requires dedicated shaft | Requires space for pipes and motor unit |
| Noise Level | Very low | Moderate due to vacuum motor |
| Maintenance Needs | Minimal | Regular servicing required |
| Initial Cost | Generally lower | Significantly higher |
| Efficiency in High Use Areas | Moderate | High |
| Hygiene Level | Good with proper upkeep | Excellent due to enclosed airflow |
| Suitable Buildings | Homes, small apartments | Hospitals, hotels, large complexes |
This comparative analysis clearly shows that both systems serve the same purpose but vary in performance and requirements.
Efficiency Comparison
When analysing efficiency, it is important to look beyond simple speed. Efficiency in a laundry chute system includes time saved, labour reduction, energy usage, and overall convenience.
Efficiency of Traditional Laundry Chutes
Traditional residential laundry chutes perform well in basic, low-to-moderate usage environments. Once installed, they offer a simple, reliable method of moving laundry downward without manual transport. Because they use gravity, there is no ongoing energy use, contributing to long-term efficiency in operating costs.
However, their efficiency decreases if:
Multiple floors generate large laundry volumes
The collection point frequently overflows
Items get stuck due to bulky fabric
Despite this, for standard residential or small commercial settings, traditional chutes remain a practical and efficient option.
Efficiency of Vacuum-Powered Laundry Chutes
Vacuum-powered systems are designed for large-scale or time-critical environments. Laundry is transferred quickly and directly to a processing area, which reduces the need for manual labour and speeds up workflow.
These systems are considered more efficient in terms of:
High-volume handling
Reduced staff involvement
Improved hygiene control
Faster turnaround time
However, they consume electricity and rely on mechanical components, which must be factored into overall efficiency calculations.
In the traditional vs vacuum laundry chute comparison, vacuum systems usually outperform traditional systems in large, demanding settings, while traditional systems hold their ground in smaller and medium spaces.
Safety and Hygiene Considerations
Both systems can be designed to meet safety standards, but there are differences in how they approach hygiene.
Traditional chutes must be made from fire-resistant materials and include self-closing intake doors to prevent the spread of fire and odour. Regular cleaning is important to prevent dust or bacteria buildup.
Vacuum-powered systems are fully enclosed, reducing exposure to contaminants. The fast transfer of laundry also means less chance for bacteria to spread. This is one of the main reasons they are used in healthcare environments.
For facilities focused on strict hygiene control, the vacuum system may be a better fit. For general residential use, a well-maintained traditional chute is usually sufficient.
Which Option Is Better for Prospective Buyers?
There is no universal answer. The right choice depends on the building type, budget, volume of laundry, and long-term strategy.
Traditional systems may be better if:
You want a cost-effective solution
The building is small to medium in size
You prefer low maintenance
Gravity access is available
Vacuum-powered systems may be better if:
You manage a large facility
Laundry volume is high
Speed and hygiene are a priority
Budget allows for advanced installation and upkeep
For prospective buyers, this comparative analysis is intended to provide clarity on real-world functions rather than just technical differences in a traditional vs vacuum laundry chute decision.
Environmental Impact
Traditional chutes have very low environmental impact because they consume no energy once installed. Their materials can also be recycled at end-of-life.
Vacuum-powered chutes consume electricity, which increases their carbon footprint, especially in high-usage settings. However, their efficiency in transporting large volumes can reduce other energy usage, such as lift operation for laundry transport.
When analysing efficiency from a sustainability perspective, both options have trade-offs.
Final Thoughts
Choosing between traditional and vacuum-powered laundry chutes is not just about modern versus old-fashioned systems. It is about understanding how each system performs in real conditions over time.
This traditional vs vacuum laundry chute comparison has highlighted differences in efficiency, installation, and maintenance so that prospective buyers can make an informed, realistic decision based on their building’s needs. For more information or to discuss the best solution for your property, contact Long Island Laundry Jet today.
Frequently Asked Questions
-
Yes, in most cases, a vacuum-powered system transports laundry more quickly because it uses suction rather than relying on gravity alone.
-
Traditional laundry chutes require significantly less maintenance because they have no mechanical or electrical components.
-
It is possible, but the installation can be complex and may require structural changes. Traditional chutes are generally easier to retrofit.
-
Traditional laundry chutes are more energy efficient because they do not require electricity to operate.
-
Yes, they remain widely used in residential buildings and smaller commercial structures due to their simplicity and reliability.

The Science Behind Vacuum-Powered Laundry Systems
Modern buildings are becoming smarter, cleaner, and more efficient, and even routines as simple as moving laundry are evolving through technology. One of the most fascinating innovations in this space is the Long Island Laundry Jet vacuum-powered laundry system. Unlike traditional gravity-based chutes, these systems use air pressure and controlled airflow to transport laundry at high speed through sealed tubing.
Understanding how this works requires a closer look at the physics of laundry jet technology, including air pressure, fluid dynamics, and key engineering principles. This article explores the science behind Long Island Laundry Jet systems, explaining their design, function, and the scientific concepts that make them possible.
What is a Vacuum-Powered Laundry System?
A vacuum-powered laundry system, sometimes called a laundry jet system, uses negative air pressure to move laundry from one point to another through a network of sealed tubes. Instead of relying on gravity alone, it creates a pressure difference that pulls clothing and linens into a collection point, usually in a basement or utility area.
These systems are commonly installed in multi-storey homes, hotels, hospitals, and high-rise residential buildings. They are designed to reduce physical effort, save time, and improve hygiene in laundry handling.
At its core, the system is made up of:
An inlet valve or loading point
A network of airtight tubing
A vacuum motor or turbine
A collection unit or bin
Air filtration components
Each part is carefully engineered to maintain airflow, pressure balance, and safe transport of various fabric types.
The Physics of Laundry Jet Systems
The operation of a vacuum-powered laundry system is rooted in basic physics, particularly the concept of pressure differentials and airflow motion.
Understanding Air Pressure
Air, though invisible, has mass and occupies space. At sea level, air exerts pressure on everything around us. When a laundry jet system is activated, it creates an area of low pressure inside the tube using a powerful motor or fan. The area outside the tube remains at normal atmospheric pressure.
This difference in pressure creates a force that pushes air, and anything placed in the opening, toward the low-pressure area. Laundry is essentially carried along by the moving air, similar to how wind pushes leaves along the ground.
The greater the difference between the internal and external air pressure, the stronger the pulling force. Engineers carefully calculate this pressure to ensure that the system is strong enough to move clothes, but not so strong that it damages delicate fabrics.
The Role of Fluid Dynamics
Fluid dynamics is the branch of physics that studies how liquids and gases move. In a vacuum-powered laundry system, the air moving through the tube is treated as a fluid. The principles of fluid dynamics help determine:
The ideal diameter of the tube
The required airflow speed
The smoothness of the tube interior
The angle of bends and turns
Air must flow smoothly through the system to prevent blockages or slowdowns. Engineers describe this as laminar flow or controlled turbulent flow, depending on the design used in laundry jet installation. If airflow is too turbulent, it can cause friction, noise, and reduced efficiency.
Engineering Principles Behind the System
Beyond physics, advanced engineering principles shape the safety and efficiency of vacuum-powered laundry systems.
Tube Design and Material Selection
The tubes used in these systems are specifically designed for low friction and high durability. Common materials include smooth PVC, stainless steel, or special polymers. These materials help reduce friction between the laundry and the inner wall of the tube.
The interior surface must be seamless to prevent fabrics from snagging. Even small imperfections can slow down transport or cause material to get stuck.
Tube diameter is another critical factor. If the diameter is too large, the system may lose efficiency. If it is too small, bulkier items may clog the system. Engineers calculate the optimal diameter based on expected laundry volume and type of use.
Bend Radius and Directional Flow
Every curve in the system affects how the air and laundry move. Sharp bends create resistance, which slows down airflow and increases the risk of blockages. Vacuum-powered laundry systems are designed with gentle curves and wide bend radii to maintain continuous airflow.
The system layout must also follow a logical path. Unnecessary turns, long horizontal runs, or steep inclines require more power to maintain effective suction. Careful planning is essential for both new construction and retrofit installations.
Noise and Vibration Control
High-speed air movement and powerful motors can generate sound and vibration. Engineers address this by incorporating sound-dampening materials, vibration isolators, and insulated mounting brackets. Strategic placement of the motor unit is also important to reduce noise in living areas.
These design elements help balance performance with comfort for building occupants.
Filtration and Air Quality
Air entering the system carries dust, lint, and small fabric particles. Without proper filtration, these particles could be released back into the environment. High-quality filters are used to trap debris, contributing to improved indoor air quality.
In environments like hospitals and hotels, this becomes an essential feature, as it helps limit airborne contaminants during laundry transport.
Comparison of Traditional and Vacuum-Powered Laundry Movement
The following table highlights the key scientific and functional differences between gravity-based and vacuum-powered laundry transport systems.
| Feature | Traditional Laundry Chute | Vacuum-Powered Laundry System |
|---|---|---|
| Movement method | Gravity | Air pressure and suction |
| Scientific principle | Gravitational force | Air pressure differential and fluid dynamics |
| Speed of transfer | Moderate and depends on height | Fast and consistent |
| Tube direction | Mainly vertical | Vertical and horizontal |
| Risk of blockage | Higher with bulky items | Lower due to controlled airflow |
| Engineering complexity | Simple | Advanced |
| Hygiene control | Limited | Enhanced with sealed tubing and filtration |
| Noise level | Low | Moderate with noise control solutions |
This comparison shows how vacuum-powered systems integrate advanced physics and engineering to improve overall efficiency.
Environmental and Energy Considerations
Vacuum-powered laundry systems do consume electricity to operate their motors. However, their energy use is often offset by greater operational efficiency.
In large facilities, the systems can reduce the need for manual labour and multiple utility rooms on different floors. This leads to:
Lower overall energy use for transporting laundry
Improved building layout efficiency
Reduction in human physical strain and risk of injury
Modern systems are increasingly designed with energy-efficient motors and smart control features that only activate when needed.
Final Thoughts
The science behind vacuum-powered laundry systems is a powerful combination of physics, air pressure, fluid dynamics, and advanced engineering principles. These systems show how everyday tasks can be transformed by applying scientific thinking and precise design.
For curious readers seeking scientific insight, vacuum-powered laundry transport is an excellent example of how invisible forces like air pressure shape practical innovations. It demonstrates how carefully applied physics can improve efficiency, hygiene, and convenience in modern living environments. To learn more about installing or upgrading a vacuum-powered laundry system in your building, contact us today for expert guidance and solutions.
Frequently Asked Questions
-
A traditional chute relies on gravity, while a vacuum-powered system uses air pressure and controlled airflow to move laundry through tubes, allowing for horizontal and vertical transport.
-
Yes. Systems are designed with smooth interiors, controlled airflow, and calculated pressure levels to ensure clothing is not damaged during transport.
-
Fluid dynamics controls how air flows through the tube network. It determines airflow speed, direction, and efficiency, all of which affect how effectively laundry is transported.
-
Yes. They are increasingly being installed in multi-storey homes and luxury residences where convenience and efficiency are priorities.
-
Modern systems are designed with energy-efficient motors and operate only when needed, helping to reduce unnecessary electricity consumption.

Enhancing Home Value with Modern Laundry Solutions

In the competitive real estate market today, every detail can influence a home’s value and appeal to potential buyers. While kitchens and bathrooms often receive the most attention, the laundry room has become an increasingly important space that can significantly impact a property’s functionality and overall impression.
A modern, well-designed laundry area not only improves daily convenience but also reflects thoughtful home upgrades that buyers appreciate. Systems like the Long Island Laundry Jet transform the traditional laundry room by combining efficiency, organization, and style, making chores quicker and safer. Investing in such solutions elevates both the usability and aesthetic appeal, ultimately enhancing property value and marketability.
Understanding the Impact of Laundry Room Upgrades
Upgrading a laundry room goes beyond aesthetics; it transforms how homeowners interact with daily chores. Modern systems save time, reduce physical strain, and create organized spaces, which enhances overall functionality. A well-designed laundry area can influence a buyer’s perception, signaling a home that is efficiently maintained and thoughtfully upgraded, ultimately contributing to higher property value and market appeal.
What Makes a Modern Laundry Room Valuable?
A modern laundry room is more than a utility space. Its design and functionality can impact home appeal and resale value. Key aspects include:
Efficiency: Modern systems save time, water, and energy.
Organization: Built-in storage and innovative designs keep spaces clutter-free.
Safety: Advanced solutions reduce the physical strain of carrying heavy laundry.
Aesthetic Appeal: Sleek designs create a polished look for potential buyers.
How Laundry Upgrades Affect Property Value
Modern laundry solutions can boost your home’s marketability by offering:
Higher resale value: Homes with updated amenities often command better offers.
Faster sales: Efficient and attractive laundry rooms draw more buyer interest.
Competitive advantage: Unique features like a home laundry chute distinguish your property.
Key Features of Modern Laundry Systems
Modern laundry systems combine efficiency, convenience, and style to transform ordinary utility spaces. Features like vacuum laundry chutes streamline clothing transport, while energy-efficient washers and dryers reduce water and electricity consumption. Smart technology enables remote monitoring and cycle notifications, and custom storage solutions—including cabinetry, pull-out hampers, and durable countertops—enhance organization and aesthetics. Together, these elements create a functional, safe, and visually appealing laundry area that adds significant value to any home.
1. Laundry Chute Systems
Traditional laundry rooms require carrying baskets between floors, a process that can be cumbersome and time-consuming. Modern laundry chute systems, such as the Laundry Jet, use vacuum technology to transport clothes, towels, and linens swiftly from multiple access points to the laundry area. Features include:
Multiple ports for convenient access
High-powered suction for efficiency
Hygienic containment to minimize clutter and germs
2. Energy-Efficient Appliances
Modern washers and dryers reduce energy and water consumption while improving wash performance. Key features include:
High-efficiency washers with rapid cycles
Eco-friendly dryers with moisture sensors
Energy Star certification to lower utility costs
3. Smart Technology Integration
Smart laundry systems allow homeowners to monitor and control appliances remotely. Features include:
Cycle notifications via smartphone apps
Energy usage tracking for sustainability
Maintenance alerts to extend appliance life
4. Custom Storage and Design
Effective laundry room design incorporates:
Built-in cabinets and drawers
Pull-out hampers and drying racks
Durable countertops and flooring for a polished look
Benefits of Upgrading Your Laundry Room
Upgrading your laundry room offers multiple advantages, from boosting home value to improving daily convenience. Modern systems reduce the time and effort required for chores while enhancing safety by minimizing heavy lifting. Improved organization, with features like built-in storage and pull-out hampers, keeps the space clutter-free. Additionally, stylish designs and smart appliances create a visually appealing, functional area that appeals to homeowners and potential buyers alike.
Increased Home Value
Installing modern laundry systems can enhance your home's resale value. Homes with well-designed laundry areas tend to attract buyers who value convenience and efficiency.
Enhanced Daily Functionality
Upgraded systems simplify laundry routines by:
Reducing the time spent transporting clothes
Minimizing clutter in bedrooms and bathrooms
Allowing multiple users to manage laundry simultaneously
Safety and Convenience
Carrying heavy laundry baskets can be risky for children and the elderly. A vacuum-powered laundry chute system reduces this hazard, creating a safer home environment.
Improved Organization
A centralized laundry solution consolidates dirty clothes, linens, and towels, keeping your home neat and structured.
Design Ideas to Maximize Impact
Maximizing the impact of a laundry room involves combining functionality with aesthetics. Open shelving and custom cabinets enhance storage and accessibility, while neutral color palettes create a timeless, spacious feel. Thoughtful layouts ensure efficient workflow from sorting to folding, and statement lighting brightens work areas while adding style. Incorporating durable countertops, pull-out hampers, and organized spaces not only simplifies chores but also elevates the room’s overall appeal and value.
Open Shelving and Cabinets
Open shelves provide easy access to frequently used items, while closed cabinets hide clutter for a clean appearance.
Neutral Color Palettes
Soft, neutral tones create a timeless look that appeals to most buyers, while also making the room feel spacious.
Functional Layouts
Design layouts should allow smooth workflow:
Sorting area
Washing and drying zone
Folding station
Statement Lighting
Modern lighting can enhance both style and functionality, brightening work areas and creating a welcoming atmosphere.
Smart Laundry Solutions: The Future of Home Laundry
Smart laundry solutions, like vacuum-powered chute systems, combine convenience, efficiency, and safety. Remote monitoring, energy optimization, and low-maintenance features streamline chores, while customizable access points and modern designs make laundry rooms more functional, organized, and appealing to homeowners and potential buyers.
The integration of smart technology and innovative systems like the Laundry Jet transforms the laundry experience.
How a Vacuum Laundry Chute Works
Load Laundry: Insert clothing into designated chute points.
Activate Vacuum: The high-powered suction system transports laundry through tubing.
Laundry Delivered: Clothes arrive in the laundry room within seconds, ready for washing.
Advantages of Smart Systems
Remote monitoring for convenience
Energy consumption optimization
Low maintenance with periodic checks
Customization Options
The Laundry Jet can be tailored for:
Single or multi-story homes
Multiple access ports
Varied vacuum power to accommodate different loads
Comparison Table: Traditional vs. Modern Laundry Systems
| Feature | Traditional Laundry Room | Modern Laundry System (Laundry Jet) |
|---|---|---|
| Transporting Clothes | Manual baskets | Vacuum chute system |
| Time Efficiency | Moderate | High |
| Safety | Moderate | High |
| Organization | Limited | Centralized, clutter-free |
| Smart Integration | None | Remote monitoring, alerts |
| Energy Efficiency | Low | High |
| Property Appeal | Low | Increased value |
Tips for Maximizing Home Value with Laundry Upgrades
Install a Vacuum Laundry Chute: Saves time and enhances organization.
Incorporate Smart Appliances: Modern washers and dryers attract buyers.
Use Durable, Stylish Materials: Enhances aesthetics and longevity.
Optimize Layout: Ensure a workflow that simplifies laundry tasks.
Add Storage Solutions: Pull-out hampers, shelving, and cabinetry maximize functionality.
Conclusion
Modern laundry solutions, particularly vacuum-powered systems like the Long Island Laundry Jet, offer homeowners an excellent opportunity to increase property value while improving daily convenience. Efficient, safe, and visually appealing laundry spaces attract buyers and create a more organized home environment. By investing in smart technology, custom storage, and high-quality appliances, you can transform your laundry room into a functional asset that enhances your property’s appeal and overall value. To learn more or schedule an installation, contact Long Island Laundry Jet and let our experts help upgrade your home.
Frequently Asked Questions
-
The vacuum technology is designed to work in both single- and multi-story homes.
-
Most homes can accommodate 2 to 6 ports, but the system is fully customizable based on layout.
-
Yes. Each port features a locking mechanism to prevent accidental access.
-
Yes, towels, linens, and small toys can be sent, but heavy or wet items should not be used.
-
Periodic filter cleaning and occasional vacuum motor checks are required. Service plans are available for convenience.

Revolutionize Your Home: Discover the Benefits of Laundry Jet

Modern homeowners increasingly seek ways to make everyday tasks more efficient and organized. One innovative solution gaining popularity is the vacuum-powered laundry chute, such as the Long Island Laundry Jet system. This advanced residential laundry system not only streamlines the process of moving clothes from bedrooms or bathrooms directly to the laundry area but also eliminates the need to carry heavy laundry baskets, reducing household clutter and saving valuable time.
With busy schedules, families often struggle to keep up with laundry, which can lead to disorganized spaces and increased stress. The Long Island Laundry Jet offers a practical solution by integrating seamlessly into the home’s design while providing efficient, automated laundry transportation. This system enhances both convenience and home hygiene, making laundry management effortless for homeowners.
What Is a Vacuum-Powered Laundry Chute?
A vacuum-powered laundry chute is a modern residential system designed to transport dirty laundry through a network of pipes using suction rather than gravity. Unlike traditional laundry chutes, which rely on a vertical shaft, vacuum-powered systems can navigate longer and more complex routes, making them suitable for multi-story homes or layouts where traditional chutes are impractical.
Laundry Jet, a leading brand in this technology, provides ports in multiple rooms. When a port is opened, the vacuum system activates, pulling laundry efficiently to a central collection point, usually in the laundry or utility room.
Key Features
Quiet operation for minimal household disruption
Compact ports that blend with home interiors
Ability to handle multiple loads, including heavy items like towels and linens
Automated or sensor-based activation
How Does the Laundry Jet System Work?
The Laundry Jet system uses powerful air suction to transport clothes quickly and safely from various rooms to a central laundry area. Its closed-pipe design prevents clothes from getting stuck, while the controlled airflow ensures delicate fabrics remain undamaged, providing an efficient and reliable solution for modern homes.
The system operates through a simple yet effective process:
Activation: Opening a chute port triggers the vacuum system.
Suction: Dirty laundry is drawn into the piping system via air pressure.
Transportation: Laundry travels through the network directly to the designated laundry area.
Deactivation: Closing the port stops the vacuum, saving energy.
This system allows homeowners to deposit laundry quickly from bedrooms, bathrooms, or closets without manual transportation, enhancing convenience and reducing time spent on household chores.
Benefits of Installing a Laundry Jet System
One of the primary advantages of a vacuum-powered laundry chute is the convenience it provides. Homeowners no longer need to carry heavy laundry baskets up and down stairs. The automated system ensures laundry moves directly to the laundry room efficiently, saving time and physical effort.
Dirty laundry can carry bacteria, allergens, and odors. By immediately transporting clothes to a centralized location, the Laundry Jet system reduces exposure to allergens and keeps living spaces cleaner. Proper Laundry Jet system installation ensures the chute operates smoothly, prevents blockages, and maintains the enclosed design that effectively contains odors, keeping your home hygienic and organized.
Convenience and Time Savings
One of the primary advantages of a vacuum-powered laundry chute is the convenience it provides. Homeowners no longer need to carry heavy laundry baskets up and down stairs. The automated system ensures laundry moves directly to the laundry room efficiently, saving time and physical effort.
Improved Hygiene and Cleanliness
Dirty laundry can carry bacteria, allergens, and odors. By immediately transporting clothes to a centralized location, the Laundry Jet system reduces exposure to allergens and keeps living spaces cleaner. The system’s enclosed design also prevents odors from spreading throughout the home.
Energy Efficiency
The vacuum-powered system only operates when a port is opened, making it energy-efficient compared to constantly running devices. This controlled operation ensures minimal power usage, contributing to lower utility costs.
Safety for All Household Members
In homes with young children, elderly family members, or individuals with mobility issues, traditional laundry transport can pose safety risks. A Laundry Jet system reduces the need for carrying heavy baskets up stairs, minimizing the risk of slips, falls, and strains.
Seamless Home Integration
Modern systems are designed to blend aesthetically with home interiors. Ports can be incorporated into closets, cabinetry, or walls discreetly, preserving the home’s visual appeal while adding functionality.
Support for Large Households
For families with multiple members, a vacuum-powered chute can handle higher volumes of laundry efficiently. It eliminates bottlenecks and ensures that laundry tasks remain manageable, even during busy periods.
Installation Considerations
Before installing a Laundry Jet system, homeowners should evaluate several factors:
Cost: Installation requires professional setup and may be more expensive than traditional chutes.
Space: Adequate space is required for piping and ports, especially in retrofits.
Maintenance: Regular inspection ensures efficient operation and prevents blockages.
Compatibility: Check structural feasibility in multi-story homes or existing constructions.
Cost Comparison
| Feature | Laundry Jet (Vacuum-Powered) | Traditional Laundry Chute |
|---|---|---|
| Installation Complexity | High | Low |
| Cost | $2,500 – $15,000 | $800 – $2,000 |
| Energy Efficiency | High | Moderate |
| Multi-Story Suitability | Yes | Limited |
| Maintenance Requirements | Moderate | Minimal |
How Laundry Jet Aligns with Modern Home Needs
In the era of smart homes, homeowners are increasingly looking for automation solutions that reduce daily stressors. Vacuum-powered laundry chutes provide a practical example of home automation improving quality of life. By eliminating manual transport, improving home hygiene, and saving time, systems like Laundry Jet fit seamlessly into modern, busy lifestyles.
Conclusion
Vacuum-powered laundry chutes, such as Laundry Jet, represent a practical, hygienic, and time-saving solution for modern homes. While installation costs are higher than traditional systems, the long-term benefits—including convenience, safety, and energy efficiency—make them a worthwhile investment for homeowners seeking to enhance household functionality.
By integrating this system, homeowners can transform their laundry routine, reduce physical strain, and maintain a cleaner, more organized living space. The Laundry Jet system exemplifies how residential automation can combine practicality with modern design to improve everyday life. To learn more about Laundry Jet system installation or to schedule a consultation, contact us today.
Frequently Asked Questions
-
Yes, retrofitting is possible, though installation is more complex than in new constructions. Professional evaluation is recommended.
-
Modern systems operate quietly, with noise levels similar to a household appliance, ensuring minimal disruption.
-
Yes, Laundry Jet is designed to handle heavy linens, towels, and multiple loads efficiently.
-
Routine inspection is recommended to clear potential blockages and ensure the vacuum mechanism functions properly.
-
The system is safe when installed correctly. Ports can be equipped with locks or safety features to prevent accidental use by young children.

Integrating Laundry Jet into Smart Home Systems

Introduction
Smart homes are no longer futuristic concepts but practical realities shaping how people live, work, and manage everyday tasks. From intelligent lighting to automated climate control, technology integration continues to redefine convenience and efficiency. One of the emerging innovations in this ecosystem is the Long Island LaundryJet system, a modern take on laundry transport that eliminates traditional laundry chutes while enhancing energy efficiency and connectivity.
This blog explores how smart home laundry integration with Long Island LaundryJet contributes to seamless home automation, the role of IoT in enhancing usability, and the long-term implications for households and sustainable architecture.
Understanding Laundry Jet Systems
Laundry Jet systems transform traditional laundry handling by using air-powered tubing to transport clothes directly to a central laundry area. This technology simplifies daily chores, reduces physical strain, and improves safety compared to traditional chutes. Its flexible installation makes it suitable for both new homes and retrofitted spaces.
What is a Laundry Jet?
Laundry Jet is an advanced laundry transport system designed to move clothes from different points in a home to a centralized laundry room using air-powered tubing. Unlike traditional laundry chute installations, which rely on gravity, Laundry Jet uses airflow suction to carry laundry across single or multi-level homes.
How It Works
Clothes are inserted into wall-mounted ports.
A vacuum motor activates, pulling laundry through concealed tubes.
Items are delivered directly into the laundry room receptacle.
This design eliminates the inconvenience of carrying laundry baskets across floors, while its modular installation allows integration into both new constructions and retrofits.
The Role of Smart Home Integration
Laundry Jet systems fit seamlessly into smart home ecosystems by enabling automation, remote monitoring, and IoT connectivity. Integration with smart panels, voice assistants, and mobile apps allows users to track laundry status, schedule operations, and reduce manual effort. This connectivity enhances household efficiency, simplifies routines, and aligns with modern home automation trends.
Why Laundry Jet Fits in the Smart Home Ecosystem
Smart homes thrive on automation and efficiency, and Laundry Jet complements this framework in several ways:
Hands-free operation – Reduces manual effort in transporting laundry.
IoT compatibility – Integration with existing home systems enhances connectivity.
Customizable control – Can be linked with smart panels, voice assistants, or mobile apps.
Improved household workflow – Simplifies chore management by reducing time spent on routine tasks.
Benefits of Smart Home Laundry Integration
Integrating Laundry Jet into smart homes offers significant benefits, including time savings, enhanced safety, and improved convenience. By automating laundry transport and connecting with IoT devices, households can streamline daily routines, reduce physical effort, and maintain a cleaner, more organized environment. Smart integration also optimizes space and aligns with modern home automation trends.
Convenience and Time Savings
The most immediate benefit is convenience. Families no longer need to haul laundry up or down stairs, saving time and reducing physical strain.
Safety Enhancements
Traditional laundry chute systems can present fire, dust, or child-safety hazards. Laundry Jet minimizes these risks by using sealed ports and enclosed tubing.
Space Optimization
Unlike bulky chute installations, air-powered systems require smaller wall openings and flexible routing, maximizing available floor space in modern compact homes.
Connectivity with IoT Devices
Integration with home automation systems allows Laundry Jet to work in harmony with smart appliances, such as washing machines and dryers. For example:
Notifications when laundry reaches the utility room.
Scheduling systems that align with smart washer cycles.
Remote monitoring for system performance.
Technical Considerations for Installation
Installing a Laundry Jet system requires careful planning to ensure optimal performance and seamless integration. Key considerations include the number and placement of ports, tubing layout, and electrical requirements for the motorized system. Proper installation ensures safety, efficiency, and compatibility with smart home devices. For homeowners, combining this technology with laundry chute residential setups can further enhance convenience and streamline laundry management, whether in new constructions or retrofitted homes.
New Constructions vs. Retrofits
Laundry Jet can be installed during new builds or integrated into existing homes with minimal disruption.
New Builds: Architects can incorporate tubing pathways seamlessly into designs.
Retrofits: Flexible tubing options allow installation in existing walls without major structural changes.
Power Requirements
Dedicated electrical outlet for the vacuum motor.
Connectivity options for integration with smart panels.
Cost Factors
Pricing depends on:
Number of ports installed.
Length of tubing required.
Type of motor system.
Sustainability and Green Building Perspectives
Laundry Jet systems support sustainable building practices by enhancing energy efficiency and reducing manual labor associated with traditional laundry handling. Enclosed tubing minimizes dust and indoor pollution, while streamlined laundry transport decreases household energy use. Integrating these systems into smart homes aligns with eco-friendly design principles and contributes to healthier, more efficient living environments.
Energy Efficiency
Although Laundry Jet uses a motorized system, it reduces overall household energy strain by streamlining chores, lowering transport effort, and minimizing risks of damage or inefficiencies associated with traditional chutes.
Eco-Friendly Construction Benefits
When integrated into sustainable architecture, Laundry Jet supports energy-conscious living by enhancing household efficiency and promoting cleaner indoor environments through sealed tubing that minimizes dust circulation.
Alignment with Smart Cities and Green Homes
As smart cities grow, centralized control and home automation technologies align with broader goals of reducing carbon footprints. Laundry Jet exemplifies how even routine household systems can play a role in sustainable design.
Practical Applications in Smart Homes
Laundry Jet systems offer practical benefits across a variety of smart home setups. They simplify laundry management in multi-level or multi-generational homes, improve accessibility for individuals with mobility challenges, and integrate seamlessly with smart assistants for real-time monitoring. These applications enhance convenience, reduce manual effort, and support a more efficient and connected household workflow.
Multi-Generational Homes
Laundry Jet benefits large households by simplifying laundry management across multiple floors or wings.
Accessibility Considerations
For individuals with mobility challenges, Laundry Jet eliminates the physical strain of carrying baskets, improving independence within the home.
Integration with Smart Assistants
When connected to systems like Amazon Alexa, Google Home, or Apple HomeKit, users can receive real-time updates on system status, enhancing convenience.
Conclusion
Integrating Laundry Jet into smart home systems represents a significant step toward smarter, safer, and more efficient living. By combining the benefits of automation, IoT connectivity, and sustainable design, Laundry Jet transcends its role as a simple convenience and becomes part of the larger shift toward technologically integrated homes.
For tech enthusiasts, architects, and homeowners alike, smart home laundry integration demonstrates how even routine tasks like transporting clothes can be reimagined for a future of enhanced comfort, safety, and sustainability. For more information or to explore installation options, contact us today.
Frequently Asked Questions
-
Yes, retrofitting is possible due to flexible tubing, though installation complexity depends on wall layouts and available space.
-
It can integrate with IoT platforms and smart assistants, enabling voice commands and system monitoring through mobile apps.
-
Yes, the ports are designed with safety in mind, preventing accidental access or misuse.
-
No, it uses a low-power motor and has minimal impact on household energy consumption.
-
Unlike chutes, it offers safety, flexibility, and smart connectivity, making it more suitable for modern homes.
-
Costs vary based on the number of ports, tubing length, and motor type. Professional assessment is recommended for accurate estimates.

The Environmental Impact of Traditional Laundry Methods

Introduction
Laundry is a routine part of daily life, but the way we wash and dry our clothes has significant environmental implications. From traditional hand-washing practices to modern machine-based methods, each approach carries its own impact in terms of carbon footprint, resource usage, and sustainability.
In this article, we will examine the environmental impact of traditional laundry methods, compare them with modern approaches, and discuss how small lifestyle changes—and innovative solutions like Long Island Laundryjet—can make laundry more sustainable for the planet.
Traditional Laundry Methods: An Overview
Traditional laundry practices have been used for centuries, often shaped by culture, geography, and available resources. Common methods included:
Hand-washing with natural soaps
Using rivers, streams, or communal wash areas
Sun-drying clothes on lines or rocks
While these methods seem eco-friendly at first glance, they are not without environmental costs. Factors such as water use, soap runoff, and physical strain on resources played a significant role.
Modern Laundry Practices
Modern laundry methods rely heavily on technology, including:
Washing machines and dryers powered by electricity
Synthetic detergents with complex chemical compositions
Fabric softeners and additives that increase chemical load in wastewater
Although modern methods save time and effort, they can consume large amounts of water, electricity, and non-biodegradable chemicals, raising concerns about long-term sustainability.
Traditional vs Modern Laundry: Key Environmental Differences
While traditional laundry relied on manual labor and natural resources like sun-drying, modern laundry depends heavily on electricity, detergents, and appliances. This shift contributes to higher carbon emissions, water pollution, and energy demand. Sustainable practices and technologies are now essential to balance convenience with environmental responsibility.
The debate of traditional vs modern laundry centers on balancing convenience with ecological responsibility.
Water Usage: Traditional hand-washing often consumes large amounts of water, while modern high-efficiency machines use less but still accumulate high annual usage.
Energy Consumption: Traditional methods rely on manual labor and sun-drying, whereas modern methods depend on electricity, especially for dryers.
Carbon Footprint: Traditional practices produce minimal emissions, while modern laundry contributes significantly through energy use.
Chemicals Used: Traditional soaps were mostly natural, while modern detergents often include phosphates and microplastics.
Sustainability: Both methods present challenges, with traditional methods stressing water systems and modern methods increasing reliance on electricity and synthetic chemicals.
Carbon Footprint of Laundry Methods
The carbon footprint of laundry varies significantly between traditional and modern methods. Handwashing and sun-drying have minimal emissions, relying mainly on human effort and natural energy. In contrast, modern machines consume electricity, generate greenhouse gases, and often use synthetic detergents. Reducing wash frequency, using cold water, and adopting eco-friendly technologies can help lower this impact.
The carbon footprint of laundry is influenced by multiple factors:
Traditional methods: While they avoid electricity and fuel, frequent washing in rivers or wells can still be resource-intensive.
Modern methods: Washing machines and dryers contribute to greenhouse gas emissions, especially when powered by fossil fuels. The production of synthetic detergents further adds to environmental impact.
Studies suggest that using a dryer accounts for more than half of laundry’s carbon footprint, making line-drying a more sustainable option even today.
Resource Usage: Water and Energy
Traditional laundry methods consumed large volumes of water but required little to no external energy, as washing was done by hand and drying relied on sunlight. Modern laundry machines, while more water-efficient, demand significant electricity for washing, heating, and drying. Balancing water conservation with reduced energy use remains a key sustainability challenge.
Water Consumption
Traditional laundry often uses large amounts of freshwater, especially for rinsing.
Modern machines use less water per cycle but may still consume hundreds of liters annually, depending on frequency and load size.
Energy Demands
Traditional hand-washing consumes physical effort but no electricity.
Modern laundry heavily relies on electricity, with dryers being the most energy-intensive appliance.
The Role of Detergents and Chemicals
Detergents and laundry chemicals play a crucial role in cleaning efficiency but contribute significantly to environmental impact. Traditional soaps were biodegradable and less harmful, while many modern detergents contain phosphates, microplastics, and synthetic fragrances that pollute waterways. Choosing eco-friendly, biodegradable detergents and using smaller quantities can reduce harm without sacrificing cleanliness.
Detergents are a major point of difference between traditional and modern laundry.
Traditional soaps were often biodegradable, made from natural oils or ash.
Modern detergents frequently contain phosphates, surfactants, and microplastics that pollute waterways and harm aquatic life.
Switching to eco-friendly detergents can drastically reduce the environmental burden of modern laundry practices.
The Social and Cultural Impact of Laundry Practices
Traditional laundry often carried cultural and community significance, with communal wash areas serving as social gathering spaces. Modern methods, however, prioritize efficiency and individual convenience, reducing social interaction but increasing time savings. Innovative solutions such as laundry jet installation further enhance convenience by allowing seamless and efficient transfer of clothes within households.
From an environmental perspective, this shift has replaced natural, labor-based systems with energy-intensive appliances, changing both ecological and cultural landscapes.
Traditional vs Modern Laundry: A Balanced View
Both traditional and modern laundry practices come with unique benefits and drawbacks. Traditional methods fostered community ties, used natural drying techniques, and had a lower carbon footprint, though they were time- and labor-intensive. Modern laundry systems emphasize speed, convenience, and hygiene, but often at the cost of higher energy use.
It’s important to note that neither traditional nor modern laundry methods are entirely sustainable or unsustainable.
Traditional methods excel in low energy use but may waste water.
Modern methods reduce manual effort but increase dependency on electricity and chemicals.
A hybrid approach—leveraging modern efficiency with traditional sustainability practices—could be the best path forward.
Conclusion
Laundry, whether traditional or modern, has a measurable environmental impact. Traditional methods are energy-efficient but water-intensive, while modern methods balance efficiency with higher carbon emissions. By adopting sustainable practices—such as line drying, using eco-friendly detergents, and investing in energy-efficient machines—we can significantly reduce laundry’s impact on the environment.
The choice is not strictly between traditional vs modern laundry, but rather how we adapt both approaches to align with sustainability goals.
For more information or to explore smarter laundry solutions, contact Long Island Laundryjet today.
Frequently Asked Questions
-
Traditional laundry has a lower carbon footprint due to no electricity use, but modern machines can be eco-friendly if used efficiently and powered by renewable energy.
-
Yes. Line drying eliminates the need for dryers, which are the most energy-intensive part of the laundry process, reducing overall emissions significantly.
-
Absolutely. Eco-friendly detergents avoid harmful chemicals, reduce water pollution, and are often biodegradable, making them much safer for the environment.
-
Traditional hand-washing may consume 50–100 liters per wash, while modern high-efficiency machines use around 40 liters per cycle.
-
Washing only when necessary, using cold water, air-drying clothes, and choosing eco-friendly detergents are effective ways to reduce laundry’s environmental impact.

Minimizing Water Usage in Laundry Processes

one of the main places in your home where it's consumed, and often wasted. With traditional washing machines using between 30 to 45 gallons of water per load, minimizing water usage in laundry has become an essential goal for eco-aware households. Thankfully, with smarter appliances, better products, and informed habits, it’s easier than ever to clean your clothes while conserving water.
This comprehensive guide will help you explore sustainable water-saving laundry solutions that align with eco-conscious living, featuring tips on technology, detergents, and behavior changes to reduce your environmental impact.
Why Minimizing Water Usage in Laundry Matters
Laundry processes account for a significant share of domestic water consumption. Every time you run a load of laundry using outdated methods or inefficient machines, you're using gallons more water than necessary. By reducing water waste, you contribute to:
Protecting local water supplies
Lowering utility costs
Reducing pollution from detergents and microplastics
Creating a more sustainable household routine
Learn more about Laundry Processes that promote sustainability and smart resource use.
The Environmental Impact of Traditional Laundry Practices
Conventional washing machines and outdated habits contribute heavily to water waste and energy overuse. Heated water for laundry increases energy demand, while excessive detergent runoff pollutes waterways.
Small lifestyle changes in how you wash and dry your clothes can dramatically reduce this footprint. These improvements not only help the planet but also lead to healthier homes and longer-lasting clothing.
Upgrade to Water-Efficient Appliances
Switching to water-efficient appliances, like high-efficiency (HE) washing machines, is a smart way to conserve resources and reduce utility bills. HE washers use up to 50% less water than traditional models while delivering powerful cleaning. Many include smart sensors that adjust water based on load size, preventing waste. Look for ENERGY STAR® certified machines for maximum efficiency. Pairing your appliance with a laundry jet installation can further streamline your Laundry Processes and support an eco-conscious lifestyle.
Why Choose High-Efficiency Washing Machines
Switching to a high-efficiency (HE) washer is one of the most effective ways to cut down on water use. These machines are designed to clean laundry using up to 50% less water than traditional models—without compromising performance.
Benefits of High-Efficiency Washers:
Use only 15–20 gallons of water per load compared to 30–45 gallons in older models
Include advanced sensors to optimize water based on load size
Require less detergent and shorter rinse cycles
Include ENERGY STAR® certification for environmental performance
Key Features to Look For:
Front-loading designs for better water efficiency
Eco or Quick Wash modes for lighter loads
Smart load detection to prevent unnecessary water use
Explore laundry jet installation options that pair well with modern water-efficient appliances.
Adopt Smarter Washing Habits
Technology alone isn’t enough—how you use your machines matters just as much. Sustainable laundry habits ensure you’re using your appliances efficiently.
Everyday Water-Saving Tips:
Wash Full Loads Only: Avoid washing partial loads unless your washer has a load size selector.
Use Cold Water: Most modern detergents work effectively in cold water, which reduces energy and helps clothes last longer.
Select Appropriate Cycles: Eco or light cycles often use less water. Avoid heavy-duty washes unless truly necessary.
Treat Stains First: Spot-treat rather than rewashing entire loads, which saves both water and detergent.
Wear Clothes More Than Once: Many garments like jeans, sweaters, or jackets don’t require washing after every wear.
Water-Saving Detergents and Laundry Aids
Many people don’t realize the role detergent plays in water consumption. Traditional detergents often produce more suds, requiring extra rinses.
Choose Detergents That Conserve Water:
HE (High-Efficiency) Detergents: Formulated for low-water washers and fewer rinse cycles.
Concentrated and Powder Detergents: Clean more with less.
Eco-Friendly Options: Biodegradable, phosphate-free, and non-toxic formulations reduce water pollution.
Using less detergent is also critical—follow label guidelines carefully to avoid excess soap and rinsing.
Consider Alternative Laundry Solutions
Beyond high-tech appliances, alternative laundry solutions offer creative ways to conserve water. Greywater recycling systems can repurpose rinse water for irrigation or toilet flushing, drastically cutting household waste. Manual washing tools, like portable washers or hand-washing methods, are perfect for small loads and delicate fabrics. Eco-conscious homeowners can also explore local laundromats with water-saving machines. For added convenience and efficiency, integrating a residential laundry chute supports sustainable Laundry Processes in modern homes.
Looking beyond traditional methods can further reduce your water usage.
Greywater Recycling Systems
These systems collect gently used water from your washing machine and repurpose it for:
Irrigation
Flushing toilets
Ideal for eco-conscious homes, greywater recycling is a significant investment with a powerful payoff in water conservation.
Manual and Off-Grid Washing Techniques
For smaller homes or remote living, manual washers or hand washing may be more efficient. Consider:
Foot-powered washing machines
Compact crank or tub systems
These methods use only the water you add and are great for delicates or travel needs.
Integrating Smart Laundry Infrastructure
You can enhance your home’s water-saving setup with modern infrastructure tailored for laundry efficiency.
Consider installing a residential laundry chute to streamline your laundry flow and reduce unnecessary loads by organizing dirty laundry efficiently.
Want a truly seamless experience? Opt forlaundry chute installations that work with vacuum-assisted systems for transport and water conservation synergy.
Frequently Asked Questions
-
Older top-loading machines use up to 45 gallons per load. High-efficiency front-loaders can use as little as 15 gallons.
-
Yes! Cold water is effective for most fabrics and saves energy, especially with modern detergents.
-
Greywater is lightly used water from showers or washers. When filtered, it can be reused for landscape irrigation or toilet flushing.
-
Not always. Many pods use plastic (PVA) films that may not break down entirely. Opt for eco-certified sheets or powders.
-
Smell test and inspect garments—outerwear, jeans, and loungewear often don't need washing after one use.

Eco-Friendly Laundry Solutions for Modern Homes

Doing laundry is a household necessity, but it doesn’t have to be harsh on the environment. With rising awareness around sustainability, many homeowners are turning to Eco-Friendly Laundry Solutions that reduce water use, energy consumption, and chemical pollution—without sacrificing cleanliness or convenience. Whether you're looking to cut down on waste or improve indoor air quality, these modern green alternatives offer practical ways to clean clothes while caring for the planet.
If you're also looking to optimize how laundry moves through your home, consider integrating a laundry chute vacuum to streamline the process while supporting your eco-conscious goals.
Why Choose Eco-Friendly Laundry Practices?
Traditional laundry practices often involve harsh chemical detergents, high electricity usage, and excessive water waste. These habits impact not just the environment but also your indoor air quality and long-term utility costs. By adopting sustainable laundry habits, you help lower your carbon footprint and support a healthier, cleaner home environment.
Reducing Environmental Impact
Conventional detergents can contain synthetic chemicals and fragrances that pollute water systems. Likewise, standard washers and dryers consume large amounts of electricity and water. By switching to eco-friendly practices, you:
Minimize your household’s carbon footprint
Reduce reliance on fossil fuels
Help protect aquatic ecosystems
Integrating sustainable tools like a residential laundry chute also reduces physical strain and energy spent transporting laundry between floors—a hidden sustainability win.
Sustainable Detergents and Cleaning Agents
Eco-conscious laundry starts with the right cleaning products. Unlike traditional detergents, green alternatives are biodegradable and made from plant-based ingredients that are less harmful to the planet and gentler on your skin.
Choosing Natural and Biodegradable Options
The best eco-friendly detergents avoid harsh chemicals such as phosphates, chlorine, and synthetic fragrances. Instead, look for:
Plant-based or mineral-based formulations
Labels such as USDA Organic, EcoLogo, or Green Seal
Fragrance-free or naturally scented varieties using essential oils
Sustainable Packaging
Another major benefit of green laundry products is minimal packaging waste. Concentrated formulas, detergent sheets, and refill stations help reduce plastic waste in your laundry routine.
Try detergent pods or powder in compostable packaging
Choose refillable jugs or zero-waste brands
With these small swaps, your detergent becomes part of your commitment to a sustainable home.
High-Efficiency Washing Machines: The Smart Choice
If you're serious about sustainability, investing in a High-Efficiency (HE) washing machine is one of the most impactful changes you can make. These modern appliances are designed to conserve water and energy while delivering a deep clean.
Save More Water and Energy
HE washers use up to 50% less water and 30% less electricity per load compared to traditional machines. Their sensors adjust water levels based on load size, ensuring no energy or water is wasted.
Advanced Technology for Smart Cleaning
Many new models feature:
Load sensing for optimal water use
Eco-mode cycles that reduce heating energy
Compatibility with greywater systems for reuse in irrigation
Better for Your Clothes
HE washers use gentler agitation, which reduces fabric wear. This keeps clothes looking newer for longer and reduces the frequency with which items need to be replaced—a subtle but significant form of waste reduction.
Lower Utility Bills Over Time
Though HE machines have a higher upfront cost, they deliver significant savings over time through reduced energy and water bills.
To further enhance efficiency, pair your washer with a smart laundry jet installation, enabling convenient, hands-free transfer of clothing between floors.
Eco-Friendly Drying Techniques
Dryers are some of the most energy-consuming appliances in the home. Luckily, there are numerous eco-friendly drying methods that significantly cut down on energy use.
Line Drying
Whether outdoors or indoors using a drying rack, line drying:
Uses zero electricity
Preserves fabric quality by reducing wear
Adds a fresh, natural scent when dried outside
Use Wool Dryer Balls
If you prefer machine drying, replace disposable dryer sheets with wool dryer balls. These natural alternatives:
Reduce drying time by up to 25%
Soften clothes without chemicals
Are reusable for hundreds of loads
Sensor Dry Technology
Modern dryers come with moisture sensors that automatically stop the cycle when clothes are dry, avoiding over-drying and conserving energy.
Tips for Creating a Greener Laundry Routine
Small changes in your laundry habits can make a big difference in both sustainability and utility savings.
Simple Adjustments You Can Make:
Wash in cold water to reduce heating energy
Only wash full loads to maximize efficiency
Use the right amount of detergent to prevent buildup and waste
Clean your washer regularly to maintain its performance
Choose natural fiber clothing to reduce microplastic pollution
By combining these habits with technologies like a laundry chute vacuum, you enhance both efficiency and comfort while minimizing environmental impact.
How Laundry Jet Enhances Sustainable Living
At Long Island Laundry Jet, we offer solutions that complement eco-friendly practices. Our vacuum-powered systems reduce the need for physical labor and improve the efficiency of transporting laundry between floors.
Benefits of a Laundry Jet System:
Reduces reliance on laundry baskets and stairs
Integrates with residential laundry chute systems
Saves time and effort for large households
Compatible with energy-efficient homes and smart layouts
Learn more about our full range of Eco-Friendly Laundry Solutions and how you can transform your laundry room into a green, high-performance space.
Final Thoughts
Adopting eco-friendly laundry solutions doesn’t mean sacrificing effectiveness or comfort. With energy-saving appliances, sustainable detergents, and mindful routines, you can maintain a clean, efficient home while protecting the planet.
Ready to make your laundry room greener? Start with one simple change—like switching to a green detergent or installing a residential laundry chute—and build from there. Each step you take contributes to a more sustainable future, and with systems like the laundry chute vacuum, convenience meets conservation in the most effective way possible.
Frequently Asked Questions
-
Yes. Many plant-based detergents offer equal or better cleaning performance, especially when used with modern washers. For tough stains, pre-treatment with an enzyme cleaner helps.
-
It’s better to skip traditional softeners. Instead, use vinegar or wool dryer balls, which soften fabric without chemicals.
-
Line drying can save 4-5 kWh per load, significantly lowering your household energy usage over time.
-
Absolutely. HE washers use up to 50% less water and 30% less electricity, helping both your wallet and the planet.
-
Yes. They often come in compostable packaging, reduce plastic waste, and are lighter to ship—cutting down on emissions.

Cleaning Your Laundry Jet System: Best Practices
Long Island Laundryjet systems are modern solutions that move laundry through air-powered tubes from multiple rooms to a central laundry area. Sleek, efficient, and time-saving, these systems eliminate the need for traditional laundry baskets or trips up and down the stairs. But like any frequently used home appliance, your Long Island Laundryjet system needs routine cleaning to maintain top performance and hygiene.
Over time, lint, dust, hair, and debris can build up inside intake ports, fan units, and tubing—leading to poor suction, slow transfer speeds, or even foul odors. This guide will walk you through how to clean your Long Island Laundryjet system from top to bottom—ensuring it stays efficient, sanitary, and long-lasting.
Why Cleaning Your Laundry Jet System Matters
Cleaning your Long Island Laundryjet system is crucial for maintaining its speed, efficiency, and hygiene. Over time, lint, dust, pet hair, and debris can build up inside the tubes and intake ports, causing reduced suction, slower laundry transfers, and even unpleasant odors. Regular cleaning not only prevents costly repairs but also ensures your system operates at peak performance, giving you the convenience and reliability you expect every day.
Keeping Your System Efficient and Germ-Free
The primary function of the Laundry Jet is to move dirty clothing through sealed tubes via powerful air suction. Naturally, this creates a space where dust, dander, lint, and small fabric particles collect. Without regular cleaning, these materials can:
Accumulate in intake ports and slow suction power
Cause fan strain or motor wear due to blockages
Lead to musty smells or reduced hygiene in the tubes
Attract pests if debris sits inside for long periods
Regular cleaning ensures optimal airflow, improves performance, and keeps your home cleaner and safer.
How Often Should You Clean Your Laundry Jet System?
For best results, your Long Island Laundryjet system should be cleaned every three to six months, depending on usage and household conditions. Homes with pets, larger families, or frequent laundry loads may require more frequent cleanings to prevent lint and debris buildup. Whether used as a modern laundry clothes chute or a full-featured transport system, following a consistent cleaning schedule keeps airflow strong, prevents odors, and ensures your system runs smoothly—maximizing both performance and the lifespan of your Laundryjet.
Recommended Cleaning Schedule for Owners
Your cleaning frequency should depend on how often your Laundry Jet system is used and how many people live in your home. A busy household with kids, pets, or multiple laundry loads per week will require more frequent maintenance.
General cleaning schedule:
Weekly: Wipe down intake ports and surrounding surfaces
Monthly: Vacuum intake screens and clean external fan vents
Quarterly: Flush tubes with air and inspect internal fan housing
Annually: Schedule a professional deep clean or internal inspection
Sticking to this routine prevents buildup from turning into performance issues, helping you avoid clogs or system slowdowns over time.
Step-by-Step Guide to Cleaning the Intake Ports
First Line of Defense in Laundry Jet Hygiene
The intake ports are the most exposed parts of the system—and the most frequently used. They can collect hair, lint, dust, and even small household debris. Clean these ports weekly or whenever they appear dirty.
Here’s how to clean them safely:
Turn off system power for safety
Use a microfiber cloth to wipe down the interior and exterior of the intake housing
Check the intake guard or grille for visible debris
Use a vacuum (with a narrow nozzle) to gently remove dust or lint from the intake screen
Inspect for cracks, loose seals, or unusual odors that could signal trapped moisture or buildup
This quick routine keeps airflow unrestricted and prevents dust from circulating into your laundry room.
Cleaning the Fan Unit and Exterior Housing
Supporting the Heart of the System
The fan or blower is what drives airflow through the tubing. When debris collects around this component, it can affect suction, motor strain, and overall system longevity.
Recommended monthly care includes:
Powering down the unit at the main switch or breaker
Removing the fan cover (if accessible) according to your system’s manual
Gently vacuuming dust buildup from blades, vents, and nearby components
Using a soft, dry cloth to wipe the fan housing and surrounding walls
Listening for rattling or irregular noise during reactivation, which may indicate cleaning wasn’t complete
If you notice heavy buildup or persistent performance drops, contact a certified Laundry Jet technician for professional fan disassembly and internal cleaning.
Maintaining Clean Air Tubes and Ducting
Keeping the air tubes and ducting of your Long Island Laundryjet clean is essential for optimal performance and hygiene. Over time, lint, dust, and debris can accumulate inside the tubing, restricting airflow and slowing laundry transfers. Regularly inspecting and cleaning these components prevents blockages, improves efficiency, and reduces strain on the motor. A clean duct system not only extends the life of your Laundryjet but also ensures smooth, quiet, and odor-free operation.
Keeping the Pathway Clear for Maximum Efficiency
While less accessible than the ports or fan, the internal tubing of the Laundry Jet system needs occasional attention to prevent debris accumulation or blockages.
Recommended quarterly care:
Run a “clean cycle” by sending a clean, dry microfiber cloth through each intake
Inspect tubing for moisture buildup or strange smells, which could signal a clog
Use an inspection camera (if available) to check bends or elbow joints
Contact a technician if items frequently get stuck or airflow seems reduced
For added freshness, lightly mist a clean cloth with vinegar or an antimicrobial spray before sending it through the system—but avoid strong cleaning agents that could leave residue or damage materials.
Odor Prevention and Hygiene Tips
Keeping the System Smelling Fresh
Because Laundry Jet systems handle dirty laundry, they’re prone to harboring odors if not cleaned regularly. A few extra steps can help neutralize unpleasant smells and maintain a fresh system.
Try these odor-fighting solutions:
Place a few drops of essential oil (like lavender or eucalyptus) on a cloth and send it through once a week
Ensure damp items are never placed in the system, as they contribute to mold and mildew
Deep clean fans and ports after flu season or heavy sickness in the home to remove germs
Leave the system open for airflow (if safe to do so) to allow moisture to escape
By integrating these steps into your routine, you keep both your laundry and air quality in top shape.
Common Mistakes to Avoid During Cleaning
Protecting the System from Unintentional Damage
Even with good intentions, improper cleaning can harm your Laundry Jet system or reduce its efficiency. Always follow these precautions:
Never use water or liquid cleaners directly on any fan or motor component
Don’t insert sharp objects or tools into the intake or pipe to remove items
Avoid using abrasive cleaning cloths that could damage port surfaces
Never power on the system while cleaning internal components
Don’t ignore unusual sounds, vibrations, or inconsistent airflow—they’re signs of deeper issues
Following these best practices protects your investment and prevents unnecessary repair costs.
Professional Cleaning Services: When and Why
While regular at-home maintenance keeps your Long Island Laundryjet running smoothly, there are times when professional cleaning is essential. Experts have the tools and knowledge to thoroughly remove deep-seated lint, dust, and debris from the system’s tubes, fan units, and intake ports—restoring full airflow and efficiency. Professional servicing is recommended annually or whenever you notice reduced performance, unusual noises, or persistent odors, ensuring your system stays reliable and long-lasting.
Knowing When It’s Time for Expert Help
While routine cleaning can be handled by homeowners, there are cases where expert maintenance is necessary. Most manufacturers recommend at least one professional inspection per year, especially for high-use systems.
Consider scheduling professional service if:
You notice reduced suction despite regular maintenance
Items frequently get stuck in the tubing
There’s a persistent smell or moisture issue
You haven’t cleaned the fan unit in over a year
There are signs of rodent or insect entry through the intake
Professionals can disassemble parts, access hidden tubes, flush the system, and reset control boards if needed—restoring peak performance and cleanliness.
Conclusion: A Clean Laundry Jet is a Happy Laundry Jet
Your Laundry Jet system was designed to make life easier—and keeping it clean ensures it continues doing just that. With regular care, your system can remain powerful, hygienic, and fully functional for years to come. From weekly port wipe-downs and monthly fan dusting to quarterly tubing checks and annual inspections, a little effort goes a long way. Maintaining cleanliness also improves system efficiency, air quality, and home hygiene overall.
By following this practical cleaning guide, you’ll avoid performance problems, reduce service needs, and keep your laundry process flowing smoothly and silently—just the way it should be. For expert cleaning, maintenance, or installation, contact Long Island Laundryjet today and experience worry-free laundry convenience.
FAQs: Cleaning Your Laundry Jet System
-
Weekly cleaning is ideal. A simple wipe-down and vacuuming around the port keep debris from entering the airflow system.
-
Avoid harsh chemicals. A light mist of vinegar or natural antimicrobial spray on a microfiber cloth is safe. Never spray directly into the intake or fan.
-
Signs include weak airflow, odors, clothing getting stuck, or unusual noise during operation. These indicate it’s time for internal inspection or service.
-
You can run cloth cycles through them, but deeper inspection (especially in elbows or wall sections) is best handled by a technician with proper tools.
-
Yes, if damp clothes are frequently used or the fan area retains moisture. Keep items dry and ensure regular air circulation to prevent mold development.

Maintaining Your Laundry Jet System
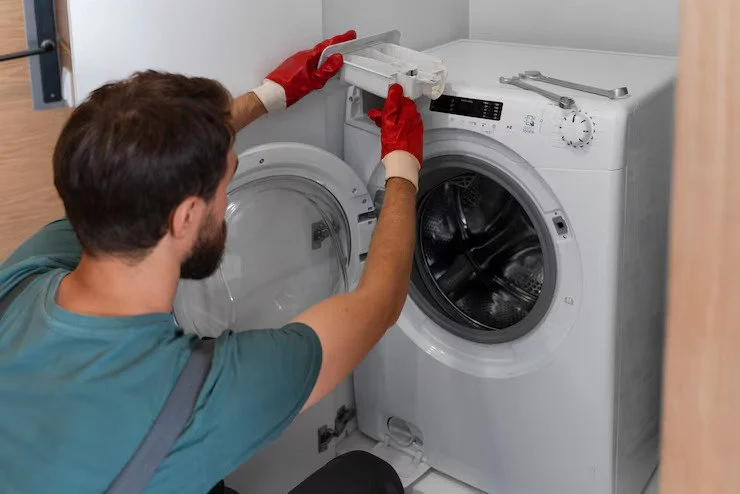
Long Island Laundryjet systems are a game-changer for modern homes—providing fast, efficient laundry transfer between rooms using air-powered tube networks. Whether installed in a multi-story home or luxury property, this automated laundry transport system adds ease and innovation to daily chores. However, like any advanced home technology, your Long Island Laundryjet requires routine maintenance to stay reliable, safe, and efficient.
Neglecting upkeep can lead to blockages, reduced airflow, motor issues, or the need for costly repairs. In this article, we’ll walk you through everything you need to know to properly maintain your Long Island Laundryjet system—covering regular cleaning, system checks, performance tips, and strategies for extending the life of your unit.
Why Maintenance Matters for Your Laundry Jet
Regular maintenance for your Long Island Laundryjet isn’t just about keeping it running—it’s about protecting your investment and ensuring top performance. Over time, lint, dust, and debris can build up inside the tubes, reducing airflow and efficiency. Routine cleaning and inspections prevent costly breakdowns, extend the system’s lifespan, and keep laundry transfers smooth and fast. A well-maintained Laundryjet means less hassle, more convenience, and peace of mind every day.
Protecting Your Investment and Performance
Your Laundry Jet system is a high-efficiency transport unit that depends on air pressure, well-aligned piping, sensors, and sealed ports to function properly. While the system is built for durability, it’s still vulnerable to common household issues like lint accumulation, accidental item blockages, and wear on moving parts.
When you maintain your system regularly, you:
Prevent airflow reduction caused by buildup in pipes
Avoid clogs and stuck clothing items that can damage motors
Extend the lifespan of fans, ports, and electrical components
Maintain fast, reliable transport to and from the laundry room
Just a small issue—like a piece of clothing lodged in a bend or neglected lint in the fan housing—can cause bigger problems if left unchecked. That’s why consistent, preventative care is essential.
How Often Should You Service Your Laundry Jet?
For optimal performance, your Long Island Laundryjet should be serviced at least once a year, with additional cleanings if you notice reduced airflow or slower laundry transfers. Regular servicing ensures the system’s motor, tubes, and seals remain in peak condition, preventing costly repairs. If your unit is new, follow the guidelines provided during your laundry jet installation to maintain warranty coverage and keep your system running efficiently for years.
Recommended Frequency for Routine Care
A well-installed Laundry Jet system can last for many years, but it depends on usage frequency and how well it’s maintained. If your household runs multiple laundry loads per week, your system is working hard—and routine attention ensures it continues performing like new.
Maintenance schedule overview:
Monthly: Visual inspections and quick cleaning of visible ports
Quarterly: Airflow checks and pipe inspection for minor blockages
Every 6 months: Deep cleaning of air channels, fans, and sensors
Annually: Full system inspection by a professional technician or authorized dealer
Scheduling these tasks is easier when tied to seasonal routines—such as spring cleaning or before holiday hosting when laundry demand increases.
Cleaning the Laundry Jet Intake Ports and Fan Unit
The Most Critical Components to Keep Clear
The intake ports and fans are the core parts of your Laundry Jet system. They draw in the air that moves clothing through the tubes and into the laundry room. Over time, lint, hair, fabric strings, or small debris can collect here, leading to slower suction or strange noises.
To clean the intake port area:
Gently remove any visible lint or debris using a vacuum with a brush nozzle
Use a microfiber cloth to wipe down the port cover and surrounding seals
If your model has a removable intake guard, clean it thoroughly and check for cracking or wear
Inspect the intake screen for signs of blockage or air restriction
For the fan unit:
Turn off system power before servicing
Open access panel if your system allows it
Use compressed air or vacuum to clean dust buildup
Look for any signs of rust, overheating, or worn electrical connections
These small tasks significantly improve efficiency and prevent long-term damage.
Checking the Laundry Jet Piping and Connections
Keeping Airflow and Clothes Moving Freely
Your Laundry Jet’s piping system is precisely engineered to move clothes smoothly. But over time, wear or accidental misuse (like overloading ports or stuffing large, damp items) can cause issues. Routine inspections keep things flowing.
Key areas to check:
Pipe joints and seals for signs of leaks or misalignment
Bends or curves where clothing might snag or slow down
Entry points into the laundry room to ensure nothing is blocking the exit
Pipe walls (via visual cameras if needed) for lint build-up or moisture issues
Avoid placing heavy or oversized items in the port that can jam the curves or corners. Encourage all family members to use the system as designed—light, dry clothing works best.
Testing System Functionality
How to Run a Routine Function Test
Doing a simple system test every month helps catch small issues early. If something feels off—like reduced airflow, strange sounds, or slower transport—use this basic test method:
Drop a standard-sized garment (like a dry t-shirt or towel) into each port
Listen for consistent suction, smooth travel, and exit into the laundry room
Observe whether any items get stuck, pause mid-pipe, or bunch at the outlet
Test control buttons or sensors to confirm responsiveness
If the item doesn’t reach the laundry room in one smooth cycle, you may have an obstruction or airflow disruption that needs attention.
Common Problems and What They Mean
Troubleshooting Early Warning Signs
No system is immune to occasional hiccups, but most issues are minor and easily resolved with quick maintenance.
Here are some of the most common signs of trouble and their likely causes:
Items not reaching laundry room: Could be a blockage, fan issue, or low power to the motor
Loud humming or whining sounds: May indicate fan obstruction or wear
Reduced suction: Often caused by lint or debris in intake or piping
Clothes getting stuck: Could be damp items too heavy for airflow or sharp pipe bend obstruction
System won’t turn on: Check breaker panel, wall control, and remote battery if applicable
Addressing these early saves time, money, and prevents wear on the entire unit.
Tips for Long-Term Laundry Jet System Longevity
Keep Your System Running Like New for Years
Your Laundry Jet was a smart investment—now it deserves smart care. A few consistent habits will extend the life of your system and avoid unnecessary service calls.
Best practices include:
Only insert light, dry laundry to minimize strain on the motor
Avoid using the system when pets, kids, or objects are near intake ports
Keep laundry rooms and nearby vents free of dust and debris
Use the system frequently to maintain optimal airflow performance
Don’t overload ports with too many garments at once
If you follow the manufacturer’s care guide and stick to a consistent maintenance schedule, your system can remain highly functional for a decade or more with minimal repair needs.
When to Call a Professional for Maintenance
Knowing When It’s Time for Expert Help
While most cleaning tasks can be done by homeowners, certain situations call for a trained technician. Annual inspections are a good rule of thumb, but immediate help may be needed if:
You hear rattling or grinding noises from the motor
The system suddenly stops working across all ports
There’s a persistent blockage you can’t locate or remove
Airflow is significantly weaker despite clean ports and pipes
Certified technicians can run diagnostic tests, replace worn parts, and verify the electrical components are operating correctly. Always use authorized Laundry Jet service providers to ensure warranty compliance and professional handling of system internals.
Conclusion
Your Laundry Jet system delivers convenience, modern design, and time-saving functionality—but only if it’s properly maintained. With just a few minutes of attention each month and a structured cleaning schedule, you’ll keep your system in peak condition for years to come. From cleaning intake ports and checking airflow to inspecting piping and scheduling annual professional care, the effort you put in now ensures your home stays efficient, tidy, and future-ready.
Whether you’re a new owner or have had your Laundry Jet for years, maintenance is the key to maximizing its value and performance. For expert servicing, repairs, or new installations, contact Long Island Laundryjet today and keep your system running like new.
FAQs: Laundry Jet Maintenance
-
Visible areas like ports can be cleaned monthly, while deep cleaning of fans and pipes should be done every 3–6 months. Annual checkups by a professional are also recommended.
-
It’s best to avoid damp items, as moisture can reduce airflow, increase lint buildup, and potentially damage internal parts. Stick to dry garments for optimal use.
-
Check intake ports for debris, clean the fan unit, and inspect piping for clogs. If airflow doesn’t return to normal, schedule a technician visit to check motor function.
-
Most Laundry Jet systems don’t use replaceable filters but may have lint traps or screens that need cleaning. Refer to your system’s manual for specific parts and cleaning intervals.
-
Annual service visits are usually affordable and prevent costly repairs. The cost is minimal compared to the price of replacing motors, sensors, or system sections due to neglect.

Comparing Traditional and Electric Laundry Chutes: Which Suits Your Home Best?

When it comes to making laundry day easier, adding a laundry chute is one of the smartest upgrades for a multi-level home. But with modern innovations on the rise, homeowners now face a key question:
Should you go with a traditional laundry chute or invest in an electric laundry chute?
In this guide, we’ll break down the pros and cons of each option so you can choose the solution that best suits your lifestyle, budget, and home design.
What is a Traditional Laundry Chute?
A traditional laundry chute is a simple vertical shaft that allows clothes to drop from one floor to the laundry area below. It’s gravity-powered, typically built from smooth materials like metal or PVC to help clothing slide easily.
✅ Pros:
Cost-effective
Minimal maintenance
Simple design
Easy to use
❌ Cons:
Requires careful vertical placement
Can only be installed in homes with direct, uninterrupted vertical space
Limited to single-direction use (top-down only)
What is an Electric Laundry Chute?
An electric laundry chute—like the high-performance systems from Long Island Laundry Jet—uses air-powered suction to transport laundry between rooms and floors. Instead of relying on gravity alone, these chutes can move laundry horizontally and vertically to reach any room in your home.
✅ Pros:
Can be installed in homes without vertical alignment
Works across multiple floors and directions
Adds a high-tech, modern touch to any home
More hygienic and enclosed system
User-friendly for all ages
❌ Cons:
Higher initial cost than traditional chutes
Requires professional installation
Requires access to power and control units
Comparing the Two: Feature by Feature
| Feature | Traditional Chute | Electric Laundry Chute |
|---|---|---|
| Cost | Lower upfront cost | Higher, due to advanced tech |
| Installation Flexibility | Needs vertical clearance | Works with most home layouts |
| Ease of Use | Drop and go | Press and send via port |
| Safety | Basic (childproof doors recommended) | Secure, enclosed ports |
| Aesthetic/Tech Appeal | Classic | Modern, smart home friendly |
| Efficiency | Limited by gravity | Quick, powered transfer |
Which One Is Right for Your Home?
Choosing between a traditional and electric laundry chute depends on your priorities:
If you’re looking for a budget-friendly solution and have a straight path from upper levels to the laundry room, a traditional chute might be perfect.
If your home’s layout is complex or you love the convenience of smart-home solutions, an electric laundry chute is the clear winner.
Either way, a laundry chute adds value, convenience, and a touch of luxury to your daily routine.
Modernize Your Home with an Electric Laundry Chute
At Long Island Laundry Jet, we specialize in state-of-the-art electric laundry chute systems that blend seamlessly into your home. Whether you're building new or retrofitting, our expert team can help you create a cleaner, smarter laundry experience.
💡 Ready to skip the stairs and level up your laundry routine?
Explore modern electric laundry chute solutions at Long Island Laundry Jet
FAQs (Frequently Asked Questions)
1. What is an electric laundry chute?
An electric laundry chute is a powered system that uses air pressure or suction to transport laundry between different rooms or floors. Unlike traditional chutes, it doesn't require a straight vertical path and can move laundry horizontally and vertically.
2. How is an electric laundry chute different from a traditional one?
Traditional laundry chutes rely solely on gravity and need a clear vertical shaft. Electric systems, like those from Long Island Laundry Jet, use air-powered tubing to move laundry quickly and hygienically, offering more flexibility in placement and design.
3. Can I install an electric laundry chute in an existing home?
Yes! Electric laundry chutes are designed to work in both new builds and existing homes. They offer more installation flexibility since they don't require a perfectly vertical shaft.

How to Add a Laundry Chute to Your Home: A Complete Guide
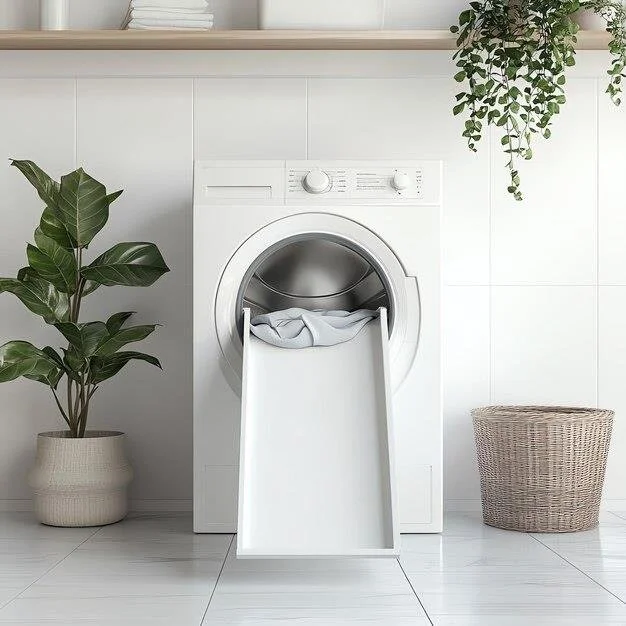
Tired of hauling heavy laundry baskets up and down stairs? Installing a laundry chute in your house can be a total game-changer. It not only saves time but adds convenience and functionality to your daily routine. Whether you're remodeling or building new, this guide will walk you through everything you need to know about adding a home laundry chute.
Let’s explore the benefits, the planning process, and how to ensure a successful installation—from concept to completion.
Why Add a Laundry Chute to Your Home?
Adding a laundry chute in house designs is more than a luxury—it’s a smart solution for busy families and multi-level homes. Here are a few reasons why homeowners love them:
Time-saving: No more carrying laundry downstairs.
Safe and simple: Reduces the risk of tripping over baskets on stairs.
Clean and efficient: Helps keep bedrooms and hallways clutter-free.
Adds value: A functional house laundry chute is a smart home upgrade.
Step 1: Plan the Best Location
Choosing the right location is crucial. Ideally, your home laundry chute should connect upper-level living spaces (like bedrooms or bathrooms) directly to the laundry room. Popular locations include:
Hallway closets
Bathroom walls
Bedroom wardrobes
Cabinetry near the laundry area
Tip: Make sure the chute has a clear vertical path and avoid areas with plumbing or wiring.
Step 2: Choose the Right Type of Laundry Chute
There are different types of laundry chute installations, and the choice depends on your space, preferences, and budget:
Vertical Drop Chutes: The most common type—straight, vertical access to the laundry room.
Curved or Angled Chutes: Ideal for tight or unconventional spaces.
Powered Laundry Chute Systems: Like those available from Long Island Laundry Jet, these use air-powered tubes to transport laundry quickly and hygienically.
Step 3: Select the Materials
The best chutes are made from durable, smooth materials that allow clothes to glide down effortlessly and prevent blockages. Popular choices include:
Stainless steel
PVC piping
Powder-coated aluminum
Avoid wood or rough surfaces that can snag fabric.
Step 4: Professional Installation vs. DIY
While some handy homeowners attempt DIY laundry chute installations, hiring a professional ensures safety and structural integrity—especially if modifications to walls or floors are required.
Working with a company like Long Island Laundry Jet gives you access to expert guidance, modern chute technology, and seamless integration with your home's layout.
Step 5: Add Functional Features
Modern house laundry chute systems can include a range of features to enhance convenience:
Childproof doors for safety
Self-closing flaps to contain odors
Multiple entry points across different floors
Integration with laundry baskets or hampers
Step 6: Maintain and Clean Regularly
A well-maintained home laundry chute can last for decades. To keep it working like new:
Clean the inside of the chute a few times per year
Check for any obstructions or sharp edges
Ensure doors and latches are working properly
Final Thoughts: Convenience Meets Smart Home Living
Adding a laundry chute in your house isn’t just a practical move—it’s a long-term investment in comfort, efficiency, and home value. Whether you choose a traditional chute or go high-tech with an air-powered system, the result is a more organized and functional household.
✅ Ready to explore modern, high-performance laundry chute systems?
Visit Long Island Laundry Jet to learn more about customized solutions, professional installations, and bringing the future of laundry into your home.
FAQs (Frequently Asked Questions)
1. Is it expensive to install a laundry chute in a house?
The cost of installing a house laundry chute depends on factors such as chute length, materials used, and labor. Simple vertical drop chutes can be more affordable, while high-tech systems or multi-level installs may require a higher investment.
2. Can a laundry chute be installed in an existing home?
Yes! Many laundry chute installations are retrofitted into existing homes. It requires careful planning to avoid pipes or electrical wiring, but experienced installers can often find creative solutions that work with your layout.
3. Are laundry chutes safe for kids?
Modern home laundry chute systems come with childproof doors and safety mechanisms to prevent accidents. Always choose a system that complies with safety standards and includes secure, self-closing access points.

Revolutionize Your Home: The Benefits of Laundry Jet
Laundry—it’s one of those unavoidable household chores that can easily pile up (literally). Between lugging laundry baskets, navigating stairs, and sorting clothes, the traditional laundry routine is anything but efficient. But what if there were a smarter, faster, and more hygienic way to handle dirty clothes?
Welcome to the world of Laundry Jet, a revolutionary home laundry chute system powered by vacuum technology. This isn’t your grandparents’ laundry chute. It’s a residential laundry system designed for the modern homeowner—bringing laundry automation and convenience to a whole new level.
Whether you’re building a new home or upgrading your current one, here’s why the Laundry Jet is quickly becoming a must-have feature for high-functioning households.
What Is the Laundry Jet System?
The Laundry Jet is an advanced, centralized vacuum-powered laundry chute that moves dirty clothes from various points in your home directly to your laundry room. With just the push of a button, clothing is whisked away through an air-powered chute system—no more carrying baskets down the stairs.
Unlike old-school gravity chutes, the Laundry Jet is a closed-loop, modular solution that offers control, speed, and design flexibility. It can be installed in new builds or retrofitted into existing homes.
👉 Learn more about Laundry Jet installation on Long Island.
1. Say Goodbye to Laundry Baskets
Let’s face it—lugging laundry hampers is time-consuming and often dangerous, especially for multi-level homes. The Laundry Jet eliminates the need for carrying heavy baskets by allowing you to send clothes from bedrooms, bathrooms, or closets to the laundry room instantly.
This not only saves time and energy but also improves home safety, especially for families with young children or elderly members who may struggle with stairs.
2. Fully Automated Laundry Management
This system integrates laundry automation into your daily life. Multiple user stations can be installed throughout the home, allowing everyone to send their clothes to the laundry room with ease. The central hub in the laundry room collects items and stores them until you’re ready to wash.
For busy professionals or growing families, automating this part of your routine means fewer household disruptions and a more organized living environment.
👉 Curious how automation works? Explore our smart laundry systems here.
3.Cleaner, More Hygienic Living Spaces
Dirty laundry isn’t just an eyesore—it’s a breeding ground for bacteria, odors, and allergens. Piles of clothing sitting in hampers or bedroom corners attract dust, mildew, and even pests.
With a vacuum-powered chute, clothes are transported immediately to a designated space. This keeps dirty items isolated and reduces clutter, making your home cleaner and more sanitary overall.
This is especially beneficial for households with:
Allergy sufferers
Pets
Small children
Shared or multi-family residences
4. Boost Your Home’s Resale Value
Smart home technology and luxury features significantly enhance property value. A home laundry chute like Laundry Jet is a standout addition that appeals to modern buyers who value convenience and innovation.
Real estate agents often highlight smart home amenities, and installing a Laundry Jet positions your property as forward-thinking and well-equipped.
Plus, it adds a wow factor during showings and appraisals—much like central vacuum systems or in-wall entertainment wiring.
5. Customizable for Any Home Layout
The Laundry Jet isn’t one-size-fits-all. It’s a modular, customizable residential laundry system that adapts to your specific needs and floor plan.
Whether you live in a two-story colonial, a large modern build, or a custom luxury home, the system can be tailored to fit:
Multiple inlet locations (bedrooms, bathrooms, closets)
Varied piping layouts
Different architectural styles
Even better, retrofitting is possible in most existing homes, and installations are fast and minimally invasive.
6.Environmentally Friendly Efficiency
The Laundry Jet system is designed with sustainability in mind. By reducing the need for multiple laundry loads and minimizing energy spent on managing clothes (like driving to/from a laundromat or drying forgotten clothes), the system indirectly contributes to energy savings.
Additionally, households often report better laundry routines, fewer lost items, and more mindful clothing habits, which contributes to less waste overall.
7. A Family-Friendly Solution
Getting kids to pick up after themselves is a constant struggle. But Laundry Jet makes laundry fun—even for the youngest members of the household.
With push-button operation, children can send their dirty clothes flying to the laundry room like magic. This encourages responsibility while reducing household clutter and nagging.
For larger families, it ensures that laundry is managed continuously rather than accumulating over days or weeks.
Is the Laundry Jet Right for You?
If you’re looking for a smart way to simplify household chores, reduce clutter, and embrace next-level convenience, the Laundry Jet is an excellent investment. It's especially suited for:
Multi-story homes
Busy families
Luxury new builds
Aging-in-place designs
Homeowners looking to increase property value
Whether you want to streamline your routine or simply hate hauling hampers, a home laundry chute is an efficient, clean, and modern solution.
Let Laundry Jet Change the Way You Live
Laundry Jet isn’t just a chute—it’s a lifestyle upgrade. With its vacuum-powered chute technology and seamless laundry automation, it redefines what’s possible in home design and daily living.
No more mess, no more strain, no more wasted time—just a smarter, cleaner home from the inside out.
👉 Contact Long Island Laundry Jet today to schedule a consultation or request a quote. Our expert team can help you plan the perfect installation to match your home’s needs and your family’s lifestyle.
Conclusion
Laundry is a part of life—but it doesn’t have to be a burden. By integrating a modern residential laundry system like Laundry Jet, you transform a daily chore into a seamless, automated experience.
With benefits ranging from enhanced hygiene and efficiency to increased home value, there’s never been a better time to invest in a home laundry chute that’s built for the future.

Installing Laundry Jet in Existing Homes: Retrofit Solutions for Smarter Living
Home renovation projects often focus on aesthetics—new floors, countertops, or lighting—but real transformation comes from upgrading the way your home works. One of the most underrated yet revolutionary upgrades? A retrofit laundry chute powered by Laundry Jet.
Gone are the days of carrying heavy laundry baskets down the stairs or dealing with dirty clothes cluttering bedrooms. The Laundry Jet is a space-saving solution that uses vacuum-powered technology to move laundry through your home at the push of a button. And best of all—it’s not just for new builds. You can install this innovative system in an existing home with a bit of thoughtful planning and expert help.
In this blog, we’ll explore everything renovators need to know about retrofitting a Laundry Jet system—how it works, what the installation process looks like, and how it can completely modernize your space.
👉 Learn more about Laundry Jet retrofits at Long Island Laundry Jet
What Is a Retrofit Laundry Chute?
A retrofit laundry chute involves installing a laundry chute system—like the Laundry Jet—into an already-built home. Unlike traditional gravity-fed chutes, Laundry Jet systems use air suction to transport clothes, offering far more flexibility and cleaner performance.
The system consists of:
User ports in multiple rooms (bedrooms, bathrooms, closets)
A network of PVC tubing
A central vacuum unit
A receiver in the laundry room
Because it uses air suction instead of gravity, the Laundry Jet can move clothes both horizontally and vertically, making it ideal for custom retrofits in any type of home layout.
Why Homeowners Are Choosing Retrofit Laundry Jet Systems
For many homeowners in the middle of renovations, efficiency is just as important as design. The Laundry Jet offers a unique blend of practicality and innovation that modern families crave. Here’s why renovators are including it in their upgrade plans:
1. Space-Saving Convenience
Traditional laundry systems take up valuable space with hampers and baskets. Laundry Jet eliminates that clutter by transporting dirty clothes directly to the laundry room through a concealed, in-wall system.
No more baskets in hallways or laundry piles in bedrooms. It’s an elegant space-saving solution that enhances both form and function.
2. Improved Hygiene and Organization
Dirty laundry can harbor bacteria, allergens, and odors. With a vacuum-powered chute, clothes are immediately contained in one central location, reducing smells and exposure to allergens. It also encourages daily laundry habits, keeping your home neater and more organized.
3. Adds Value to Your Renovation
Incorporating high-tech features during a home renovation can significantly boost resale value. Buyers are increasingly drawn to smart home solutions and energy-efficient features—Laundry Jet checks both boxes.
Installation Process: Retrofitting Laundry Jet in Existing Homes
One of the most common questions we get is, “Can Laundry Jet really be installed in a finished home?” The answer is a confident yes—with the right planning and an experienced installer.
Here’s what the installation process typically looks like:
Step 1: Initial Assessment & Home Evaluation
Our team begins with a detailed consultation and home walk-through to:
Identify optimal locations for user ports (bedrooms, bathrooms, closets)
Determine pipe routing between floors and rooms
Assess laundry room access for the receiver unit
This step is essential to create a custom system design that fits your existing structure without major demolition.
👉 Schedule your home evaluation here
Step 2: Design & Layout Planning
Next, we map out the most efficient layout. Because the system can move laundry in any direction, we can work around walls, cabinetry, and other structural features.
We design:
Minimal wall openings
Discreet port placements
Compact tubing routes
Our goal is to integrate the system seamlessly into your home with minimal visual impact.
Step 3: Installation
Once the plan is approved, installation begins. We:
Cut minimal access points in walls and ceilings
Run the vacuum-grade tubing between floors and walls
Mount the Laundry Jet ports at each chosen location
Install the central vacuum and collection unit in the laundry room
The entire process is quick and minimally disruptive. Most retrofits are completed within a few days.
Key Retrofit Considerations for Homeowners
Wall & Ceiling Accessibility
While Laundry Jet doesn’t require extensive demolition, some access points are necessary. Homes with accessible attics, crawl spaces, or utility chases have the easiest installation routes.
Electrical Access
The central unit and each port require standard power. Ensuring nearby outlets or planning minor electrical work is part of the preparation phase.
Home Layout
Multi-story homes, wide ranch-style layouts, or split-level designs all work. The modular nature of the Laundry Jet allows for flexible configurations no matter the layout.
Tips for Renovators: Planning for Success
If you’re already remodeling your home, now is the perfect time to install Laundry Jet. Here are a few pro tips:
Coordinate with your contractor: Install Laundry Jet piping alongside HVAC or plumbing routes to save time and reduce cost.
Bundle with smart home upgrades: Consider pairing it with central vacuums, home automation systems, or whole-house humidifiers for a full smart home experience.
Add multiple ports: The most popular locations include bedrooms, bathrooms, walk-in closets, and mudrooms. More ports mean more convenience.
Design for the long term: Plan for aging in place or resale by adding Laundry Jet to upper-level bedrooms or areas that may be hard to access later in life.
The Bottom Line: Yes, You Can Retrofit Laundry Jet
Whether you’re renovating one room or undergoing a full-home makeover, retrofitting a Laundry Jet system is entirely achievable—and incredibly rewarding.
From space-saving solutions to better hygiene and modern convenience, the system transforms the way you manage laundry. It blends seamlessly into your renovation plan and offers a clear return on investment through time savings and added home value.
Ready to Upgrade Your Home with a Retrofit Laundry Chute?
The Laundry Jet isn’t just for new homes—it’s the perfect upgrade for your renovation. Say goodbye to outdated laundry routines and hello to smart living with this innovative retrofit laundry chute.
👉 Contact Long Island Laundry Jet today to schedule your consultation and explore how easily this system can integrate into your current or future renovation.
Conclusion
Retrofitting a Laundry Jet system into your home is more than just a convenience—it’s a lifestyle improvement. With expert planning and smart design, you can enjoy the benefits of a vacuum-powered laundry chute even in an older home.

Common Mistakes to Avoid During Laundry Chute Installations
It all begins with an idea.
Installing a laundry chute can be a convenient addition to any home, making laundry day far less of a chore. However, the installation process can be fraught with pitfalls. Many homeowners dive into the project without proper planning, leading to mistakes that could have been easily avoided. In this article, we will explore common mistakes to avoid during laundry chute installations, emphasizing the importance of careful planning, proper material selection, and adherence to building codes. By being aware of these pitfalls, you can ensure a smoother installation process and a more efficient laundry system.
Neglecting to Plan the Chute's Path
One of the most significant mistakes during laundry chute installation is neglecting to plan the chute's path meticulously. Before beginning installation, it is crucial to determine the most efficient route for your laundry chute, ensuring that it aligns with the laundry room's location. This might seem straightforward, but many homeowners forget to consider factors such as structural obstacles, plumbing, and electrical wiring. A poorly planned chute can lead to unnecessary bends and turns, which can impede the flow of clothes and create blockages.
Ignoring Local Building Codes
Another common mistake is ignoring local building codes and regulations regarding laundry chute installations. Each municipality may have specific guidelines that dictate the size, location, and materials that can be used for chutes. Failing to comply with these codes can result in fines, the need to redo the installation, or even safety hazards. It's crucial to research your local building codes before beginning your project. This may involve visiting your local building department or consulting with a qualified contractor.
Overlooking Material Selection
The choice of materials for your laundry chute is another critical aspect that is often overlooked. Many homeowners make the mistake of using inappropriate materials that may not withstand the wear and tear of daily use. For example, using flimsy plastic or thin metal can lead to a chute that collapses or warps over time. Instead, opt for durable materials like stainless steel or heavy-duty plastic that can endure the weight of laundry and resist corrosion.
Forgetting About Ventilation
Ventilation is a crucial element that is often disregarded during laundry chute installations. A poorly ventilated chute can lead to musty odors, mold growth, and even pest infestations. When planning your installation, ensure that there is adequate airflow in the chute. This can be achieved by including vents at the top and bottom of the chute, allowing fresh air to circulate and stale air to escape.
Neglecting to Consider Accessibility
Accessibility is another factor that is often overlooked when installing a laundry chute. It's crucial to ensure that the chute is easily accessible for both use and maintenance. Many homeowners mistakenly install chutes in hard-to-reach areas, which can create challenges when it comes to cleaning or addressing blockages. Ideally, the chute’s opening should be located at a height that is easy for family members to access, especially if children will be using it. In addition to accessibility, homeowners should consider the location of the chute in relation to laundry appliances. Placing the chute close to the washing machine and dryer can streamline the laundry process and minimize the distance that dirty clothes need to be transported. Furthermore, it is important to think about the route the chute will take; it should be designed to minimize bends and turns that could potentially trap clothing or impede the flow of items. Another aspect to consider is the size of the chute opening. A larger opening can make it easier to drop in bulky items like bedding or towels, but it should still be manageable enough to prevent clothing from getting snagged. Additionally, the chute should be constructed from smooth materials to facilitate easy movement of laundry and reduce the likelihood of snags or blockages. Proper ventilation is also essential, as it helps prevent odors and moisture buildup within the chute. Installing a vent or ensuring that the chute is designed to allow airflow can help maintain a fresh environment. Finally, when planning for a laundry chute, it is wise to consult with professionals who can provide insights on building codes and safety standards. This will not only ensure compliance with local regulations but also enhance the overall functionality and safety of the installation. By taking these factors into account, homeowners can create a laundry chute that is both practical and efficient, simplifying the laundry process for everyone in the household.
Skipping the Testing Phase
After the installation is complete, many homeowners make the mistake of skipping the testing phase. It is essential to thoroughly test the laundry chute before sealing it up completely. This involves dropping various items down the chute to ensure they flow smoothly to the laundry area without getting stuck. Testing can reveal problems such as blockages, improper angles, or inadequate sizing that may not have been apparent during installation. Addressing these issues before sealing the chute can save time and money in the long run. If you notice any items getting stuck, it may be necessary to adjust the angle of the chute or modify its size to accommodate a wider range of laundry items. It's also a good idea to inspect the chute for any sharp edges or rough spots that could snag fabric. Once testing is complete and any necessary adjustments have been made, you can proceed with sealing the chute and finishing the installation. Regular maintenance checks after installation are also recommended to ensure the chute remains clear and functions properly over time. This proactive approach can help prevent future issues and keep your laundry routine running smoothly.
Conclusion
In summary, avoiding common mistakes during laundry chute installations can save you time, money, and frustration. By carefully planning the chute's path, adhering to local building codes, selecting appropriate materials, ensuring proper ventilation, considering accessibility, and thoroughly testing the chute, you can create an efficient and functional laundry solution. Taking the time to avoid these pitfalls will lead to a successful installation and a laundry chute that serves your home for years to come. As you embark on this project, remember that preparation and attention to detail are key to avoiding the common missteps that can derail your installation efforts.

How to Choose the Right Location for Your Laundry Chute Installations
It all begins with an idea.
When it comes to home improvement projects, installing a laundry chute can be one of the most rewarding investments you make. Not only does it simplify the process of transporting dirty laundry to the washing area, but it can also add significant convenience to your daily routine. However, choosing the right location for your laundry chute installation is crucial for maximizing its efficiency and functionality. In this article, we will explore key considerations to help you select the best spot for your laundry chute, ensuring a seamless transition from your living space to your laundry room.
Understanding the Basics of Laundry Chutes
Before diving into the specifics of location selection, it’s essential to understand the fundamental structure and purpose of a laundry chute. A laundry chute is a vertical passageway that directs dirty laundry from upper levels of a home to a designated laundry area, typically located on a lower floor. The chute can be made from various materials, including wood, metal, or plastic, and should be wide enough to accommodate various types of clothing items effectively. The primary purpose of a laundry chute is to streamline the process of collecting and transporting dirty clothes, making it more convenient for residents to maintain cleanliness in their living spaces. By eliminating the need to carry heavy baskets of laundry up and down stairs, a laundry chute can save time and reduce the physical strain associated with laundry duties. When considering the location of a laundry chute, several factors must be taken into account. First, the chute should be situated in a location that is easily accessible from bedrooms and bathrooms, as these are the areas where most dirty laundry accumulates. A central location minimizes the distance that residents have to travel to deposit their clothes, enhancing the chute's overall efficiency. Additionally, the chute must be designed to be safe and functional. It should be installed with adequate clearance to prevent clothes from getting stuck, and the opening should be fitted with a door or flap that can prevent odors from escaping and keep the chute clean. Proper ventilation may also be necessary to avoid musty smells and maintain a fresh environment. Another important consideration is the integration of the laundry chute with the home’s layout and aesthetic. It should blend seamlessly with the existing decor while being practical in its function. Homeowners might also want to consider the potential for future renovations or changes in the household that could affect the chute’s usability or accessibility. In conclusion, a well-planned laundry chute not only enhances the efficiency of laundry management but also contributes to an organized and tidy home. Careful consideration of its location, design, and integration into the home is crucial to maximizing its benefits.
Proximity to Laundry Room
The most critical factor when choosing a location for your laundry chute is its proximity to the laundry room. Ideally, the chute should be installed as close to the laundry area as possible to minimize the distance that clothes must travel. This not only makes it easier to keep the laundry organized but also reduces the likelihood of items getting lost or misplaced along the way.
Structural Considerations
Another vital aspect to consider when selecting a location for your laundry chute is the structural integrity of your home. The chute will require a vertical passage that may need to pass through walls, floors, or ceilings. Therefore, it’s essential to consult with a structural engineer or a qualified contractor to assess potential locations and ensure that the installation will not compromise the home’s stability.
Accessibility and Convenience
Accessibility is another crucial factor when determining the best location for your laundry chute. The chute should be easily accessible from the areas where dirty laundry is most likely to accumulate, such as bedrooms, bathrooms, or playrooms. If the chute is too far away, family members may be less inclined to use it, defeating its purpose.
Safety Concerns
Safety should always be a top priority when installing a laundry chute. This is especially important in homes with young children or pets, as a chute can pose a potential hazard if not designed and installed correctly. Ensure that the chute has a secure door or flap that prevents unauthorized access and prevents items from falling out.
Ventilation and Odor Control
Another important consideration when choosing a location for your laundry chute is ventilation and odor control. Clothes, especially those that have been worn for an extended period, can develop unpleasant odors if they are not properly ventilated. Therefore, it’s essential to ensure that the chute is located in a well-ventilated area or that measures are taken to mitigate odors.
Home Aesthetics and Design
While functionality is crucial, it’s also important to consider the aesthetics of your home when selecting a location for your laundry chute. The chute should blend seamlessly with your home’s design and not detract from its overall appearance. Consider how the chute will look in relation to surrounding walls, floors, and decor.
Cost Implications
Finally, consider the cost implications of your laundry chute installation. The location you choose may significantly impact the overall expense, as certain areas may require more extensive renovations or reinforcements. Budget for both the material and labor costs involved in the installation process, and be sure to get estimates from multiple contractors to ensure that you are receiving a fair price.
Conclusion
Choosing the right location for your laundry chute installation is a multifaceted decision that requires careful consideration of various factors, including proximity to the laundry room, structural integrity, accessibility, safety, ventilation, aesthetics, and cost implications. By taking the time to evaluate each of these aspects, you can ensure that your laundry chute serves its intended purpose efficiently and effectively.